RPi and GPIOs
The RPi can be used to program LEDs and other electrical components in a circuit.
The RPi uses its GPIOs (General Purpose Input Output) pins to send output or receive input to and from electrical components.
For some information related to the GPIO pins, read through this information.
The Scratch programming language or the Python programming language can be used to program the GPIO pins.
In this activity we will use Python to program a flashing LED.
Wiring the Circuit
It is assumed that you know how to wire a basic circuit.
If not then go here for some basic electrical circuit activities.
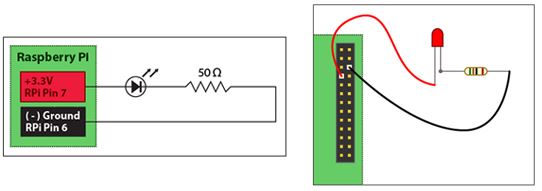
For this circuit we will run a wire from the RPI Pin 7, to an LED, to a resistor, and then back to Pin 6 ground.
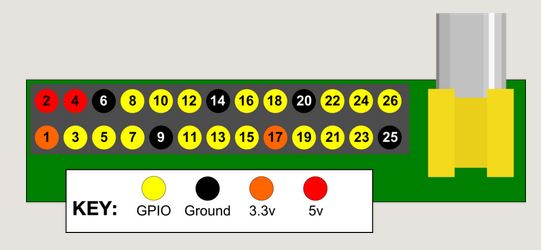
The pins on the RPi are as follows:
Before hooking the wires up to the GPIOs, test your circuit using a battery to make sure that all components work.
You should then hook up the wires to the pins while the RPi is off.
Once the circuit is all hooked up to the correct GPIO pins, it's time to start programming.
Turn on the pi and from the GUI select click on LXTerminal.
At the prompt type sudo idle.
This let's you run the python environment with administrator powers, which means you can write programs that control a lot of stuff!
In the Python window, type the following (including comments!).
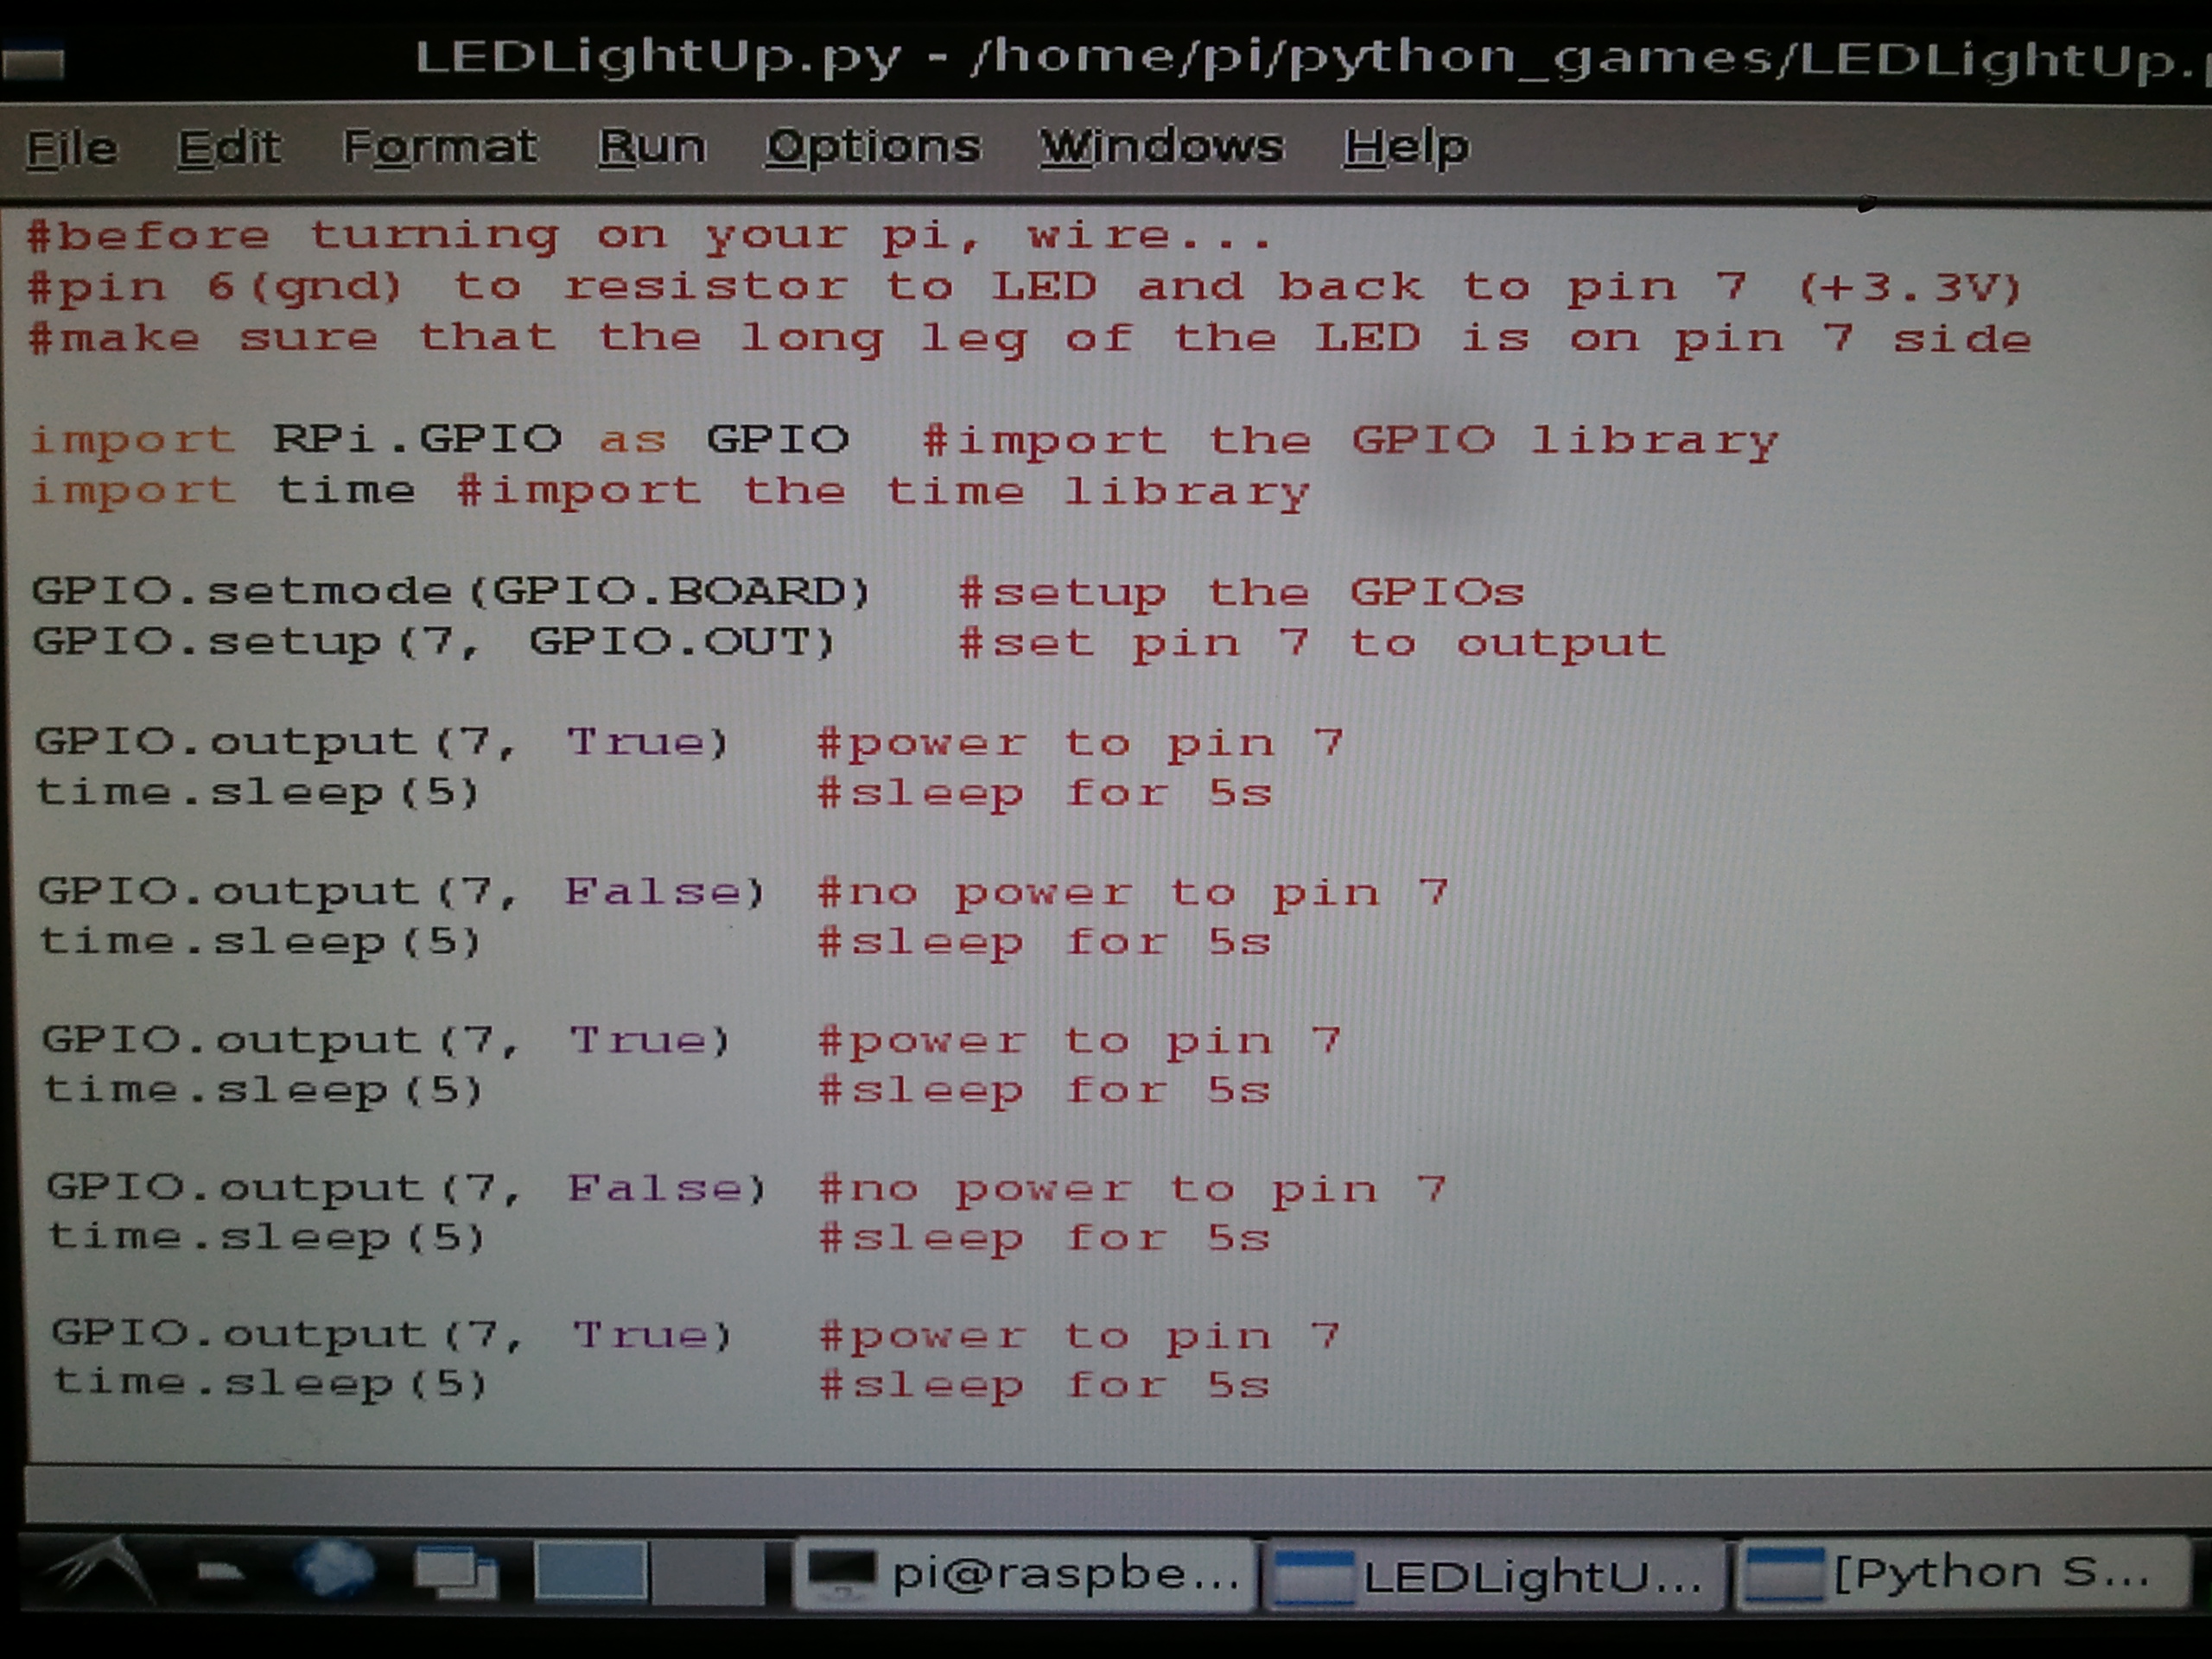
IMPORTANT: At the end of the program, add the final line of code: GPIO.cleanup().
This last line will clean up the Input and Output for the GPIOs and is good practice. If you didn't clean up the GPIOs and you left the LED on then it would stay on even after the program has closed.
When you've typed the entire program click Save and save the program to the RPi.
Then click Run... Run (or CTRL + F5).
Your LED should flash on and off for 5 seconds at a time.
Amazing!
For more information related to the GPIOs and the code used to program them, check out this link.
For a quick reaction time, check out this link.
If you would like to use the Scratch programming language to program your GPIOs, check out this tutorial.